

How to Set Up WordPress AI Connectors (And What You Can Do With Them)

WordPress 7.0, released on May 20, 2026, ships a new native AI framework alongside its redesigned dashboard and an intriguing settings page for WordPress AI connectors. If you are a site owner, developer, or plugin author curious about what this means in practice, this guide explains how the infrastructure works, walks through the WordPress AI setup, and covers what you can do once your connectors are running.
The short version: WordPress 7.0 does not include an end-user AI assistant or writing sidebar out of the box. What it ships is a shared set of infrastructure so that any compatible plugin can share the same AI connections rather than each one requiring its own separate API key configuration.
The WordPress AI Building Blocks
The new AI features are part of a broader initiative called the AI Building Blocks. There are four components, and understanding what each one does clarifies how the system fits together.
WP AI Client is the universal adapter. It adds REST API endpoints and API key management. It provides a single, unified interface for plugins to interact with any supported AI provider, without each plugin needing to write its own vendor-specific code.
Connectors are official, lightweight provider plugins that connect the WP AI Client to a specific AI service. The three connectors available at launch cover OpenAI, Anthropic, and Google. Other AI services can be connected with 3rd-party connectors.
Abilities API is the directory of capabilities. It is a central, discoverable list of everything your WordPress site can do from content operations (e.g. create, update) to custom functionality registered by plugins (e.g. translate, backup). Any plugin you install can add new abilities directly into this shared directory.
MCP Adapter is the external agent bridge. It translates server-side abilities into Model Context Protocol format, allowing AI assistants running outside your site — such as Claude Desktop or Cursor — to discover and use your site's available abilities.
For most site owners, the only part you need to interact with directly is the Connectors screen. The rest operates underneath.
Step-by-Step: How to Set Up WordPress AI Connectors
Before you start, confirm you are running WordPress 7.0 or later and have an API key ready from your chosen provider.
Step 1: Install Your Provider Plugin
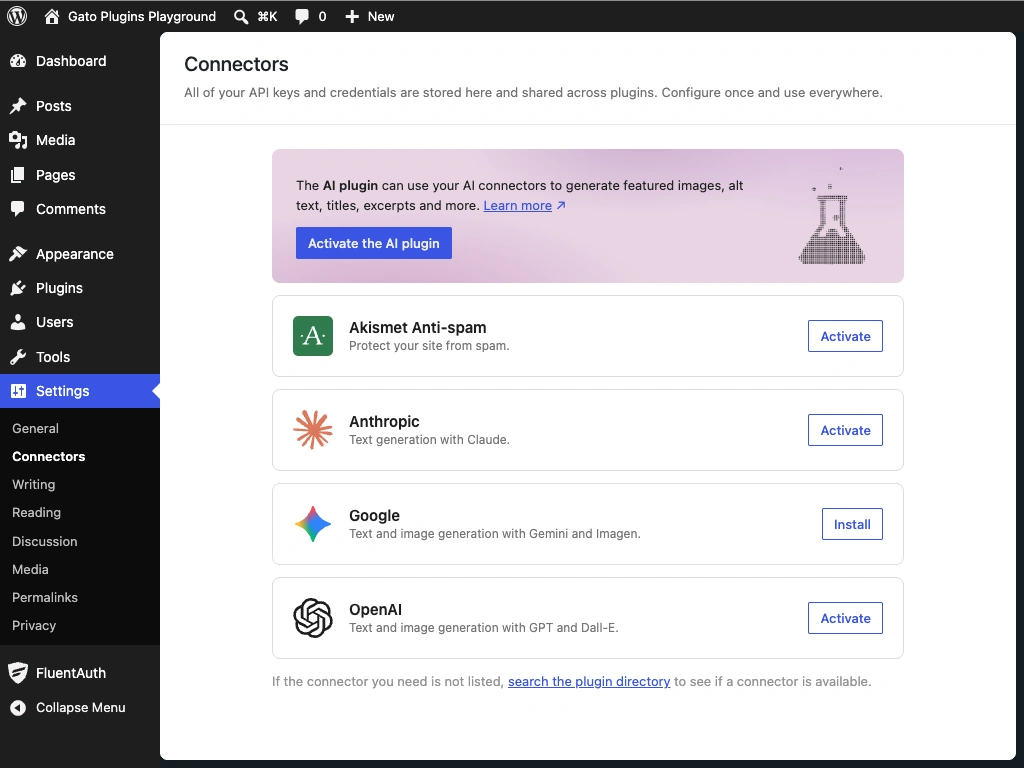
In your WordPress dashboard, go to Settings → Connectors. You will see the three default providers listed — OpenAI, Anthropic, and Google — with their status shown as not yet installed.
Click Install next to your chosen provider. WordPress will install the corresponding connector plugin from WordPress.org.
Step 2: Retrieve and Enter Your API Key
Once the connector is installed, retrieve your API key from your provider's platform:
- OpenAI: Go to platform.openai.com, navigate to API Keys, and click Create new secret key.
- Anthropic: Log into console.anthropic.com and retrieve your key from the API Keys tab.
- Google: Visit aistudio.google.com and click Get API Key.
Click Set up next to the provider in WordPress, paste your key into the input field, and save.
Step 3: Verify the Connection
Once saved, the provider listing will display a green Connected badge. Plugins with AI features can now make use of the connection.
What You Can Do With WordPress AI Today
Having a connector configured makes your site ready for AI-powered plugins. The connector itself doesn’t add any AI features to the site. Here’s an analogy to tie it all together.
- The WP AI Client is like the standardized wiring built into the walls of a building
- The connector plugins are the utility hookups that bring power to the outlets, and
- The AI features you actually use are the appliances. Separate plugins with AI features draw from the shared infrastructure rather than running their own independent wiring.
Now that you have set up WordPress AI Connectors, you need an appliance – a plugin that actually brings AI features to the site. For that you can explore the official AI plugin — it’s suggested right on the Connectors settings screen. This plugin serves as a sandbox and a reference implementation — a place for the community to test these capabilities as they develop. Much like Hello Dolly ships with WordPress as an official example of what a plugin can be, the AI plugin is the WordPress AI Team’s reference point for what AI features can look like in practice. It includes the following features:
Content creation and editorial
- Title Generation: Suggests post titles based on your current editor content, updated reactively as you write.
- Content Classification: Recommends relevant categories and tags.
- Editorial Notes & Updates: Reviews your post block-by-block and makes suggestions for grammar, readability, and clarity. You can apply the suggested improvements automatically.
- Content Summarization: Generates a summary of your post once it reaches a minimum length.
Media
- AI Alt Text: Generates descriptive alt text for images, integrated into the Gutenberg media editor workflow.
- Image Generation: Creates and refines images within the editor and media library (experimental).
Moderation
- Comment Moderation: Analyzes comments for sentiment and toxicity, with sorting and filtering available directly from the Comments screen and the Activity dashboard widget.
How Compatible Plugins Connect
Because any plugin can register abilities into the shared registry and read API keys from the Connectors screen, this infrastructure reduces configuration overhead across the board. A plugin that previously required you to manage its own API keys separately can instead fall back to whatever you have already configured under Settings → Connectors.
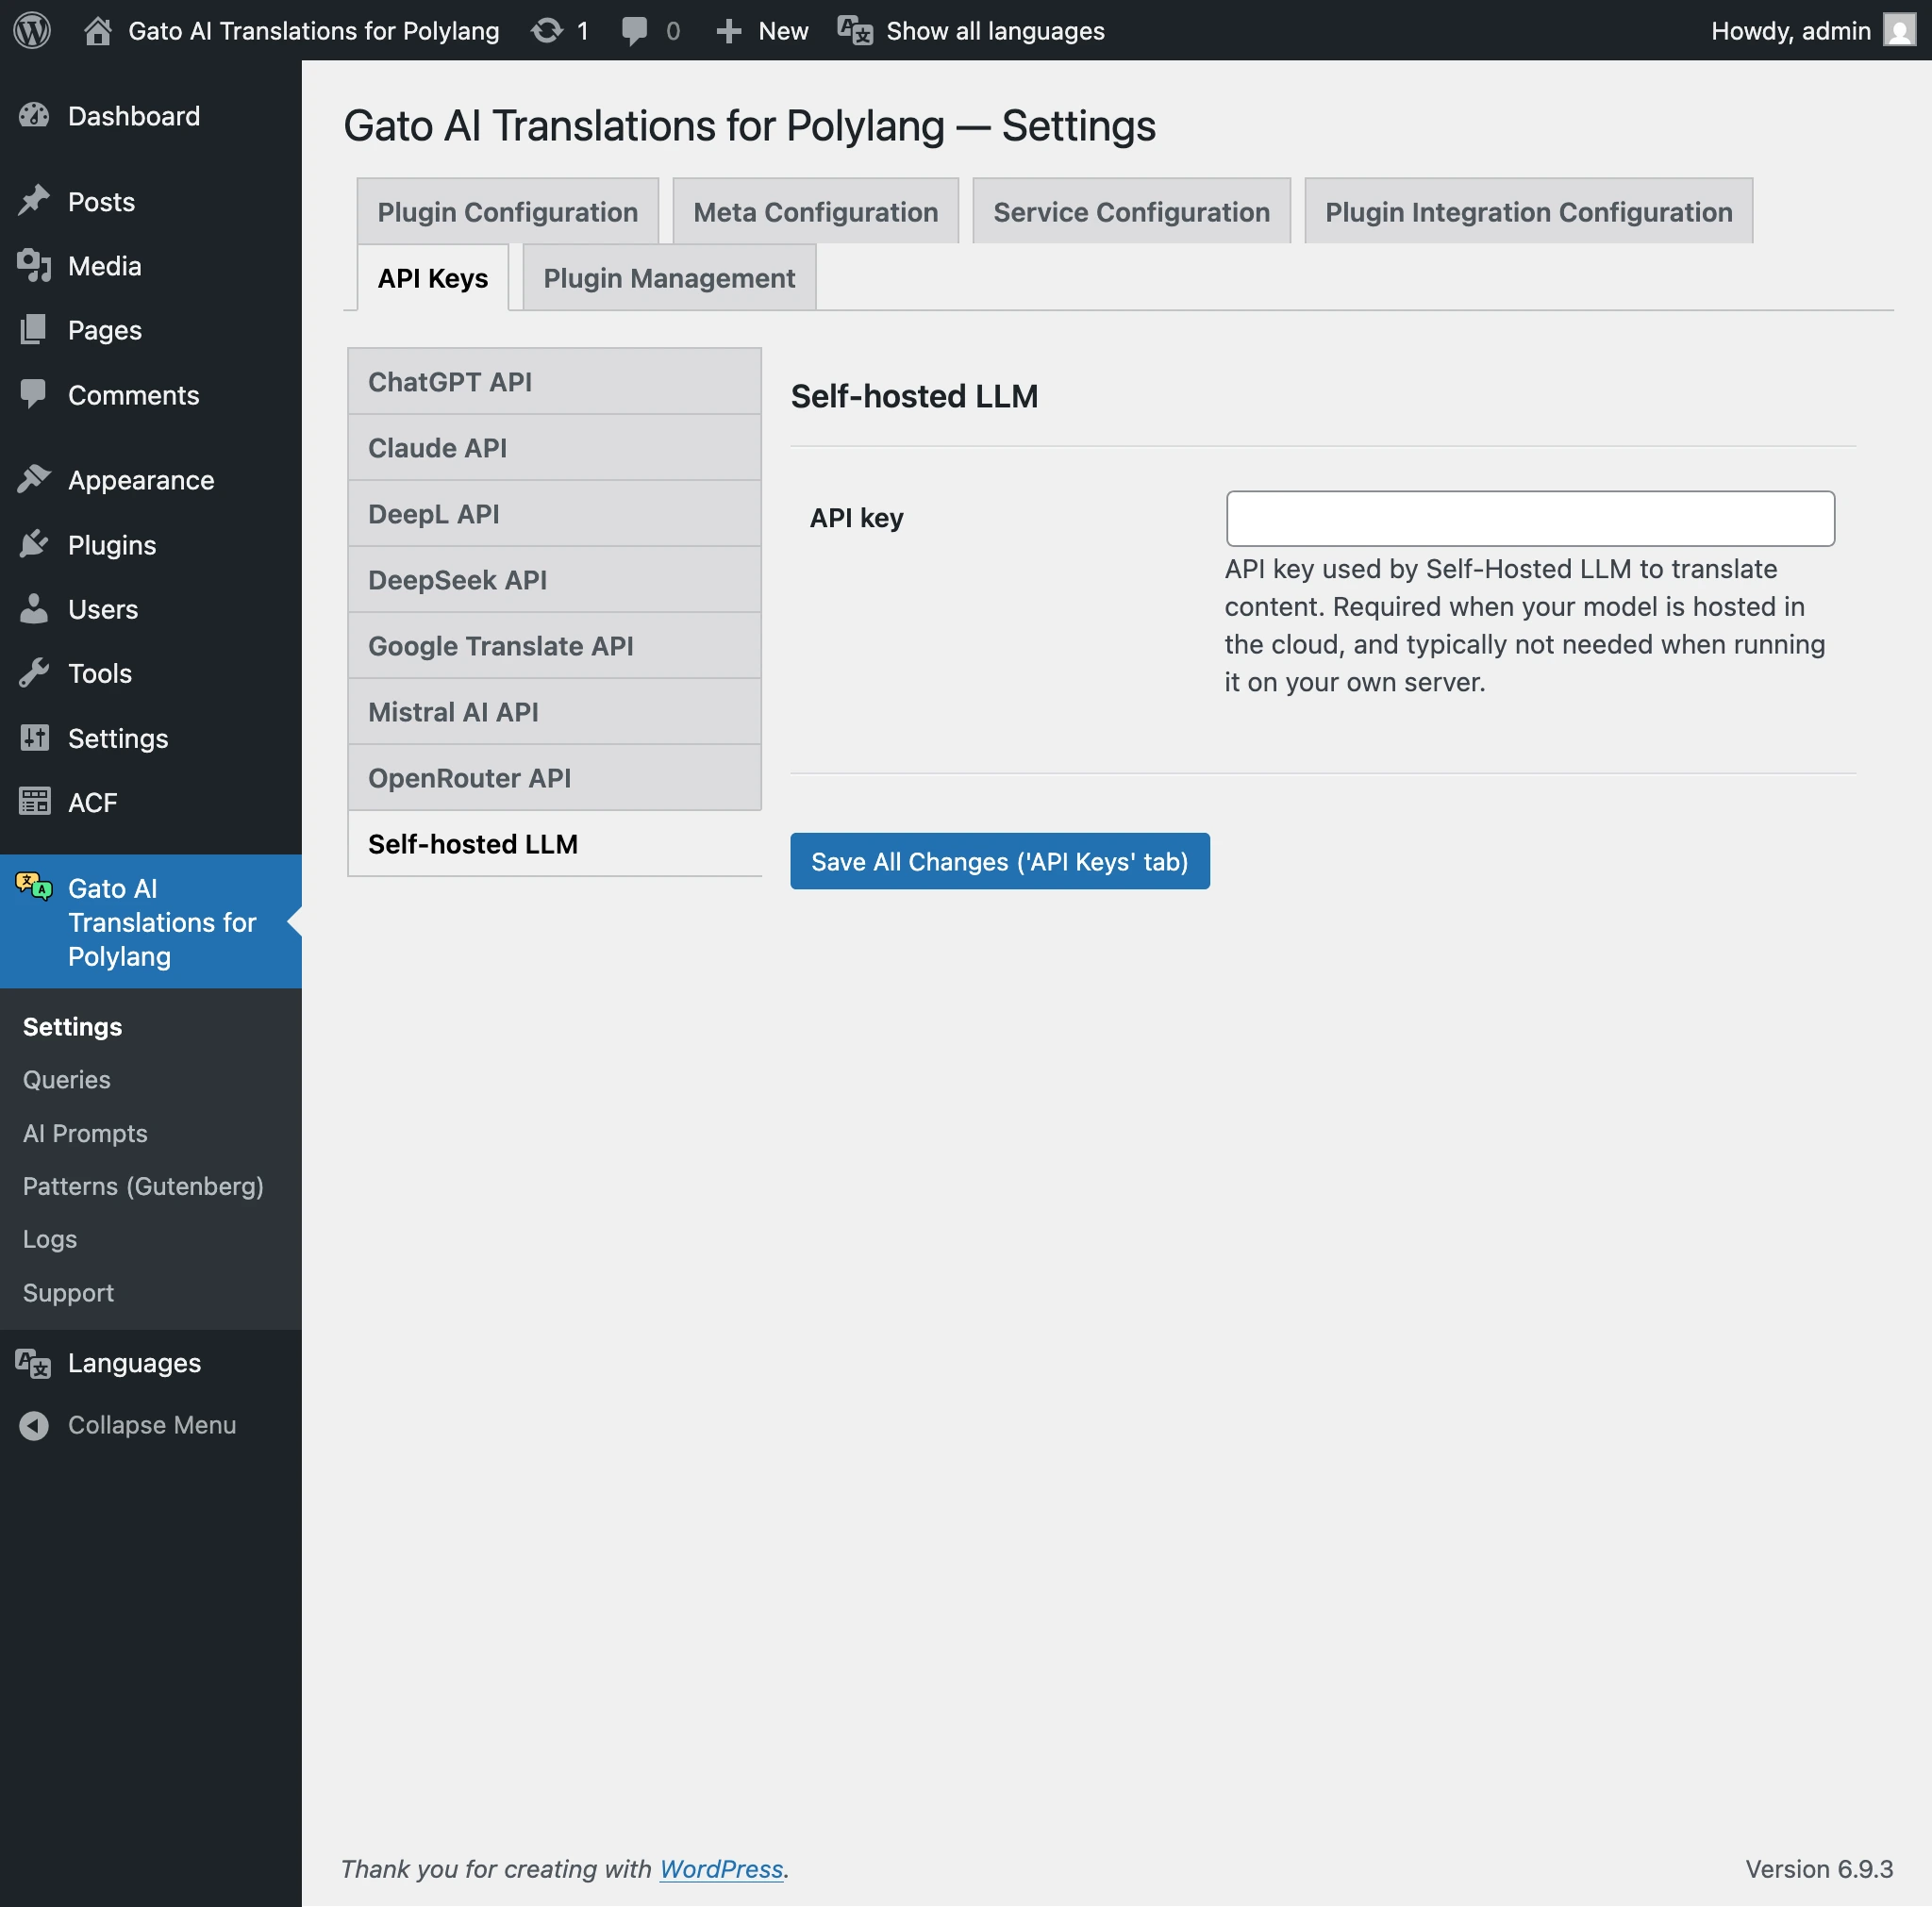
Gato AI Translations for Polylang — our plugin for translating WordPress sites using Polylang, a widely-used multilingual plugin that lets you manage multiple language versions of your content — now integrates natively with WP AI Connectors. As of v18.0, it reads API keys directly from the Connectors registry with no additional configuration required. However, our plugin also allows you to configure your API keys directly within the plugin settings to give you maximum flexibility with the AI models you can use for translations. For details on how Gato AI Translations works with your API keys, see the documentation on API keys.
Connecting External AI Agents via the MCP Adapter
If you want an external AI assistant to interact with your WordPress site — for example, to create a post, add images, improve its SEO and finally publish it — you need the MCP Adapter installed as a separate plugin. It is available to try today, and the WordPress Developer Blog has step-by-step setup instructions for Claude Desktop, Cursor, Claude Code, and VS Code.
What Comes Next
The AI Building Blocks initiative is designed as infrastructure rather than a finished product. WordPress 7.0 has a slice of AI features with the WP AI Client and AI connectors, and the core development team is continuing to work on more. Expect to see more AI in WordPress, both from core and from plugin developers — including us at Gato Plugins.
